
Security & permissions
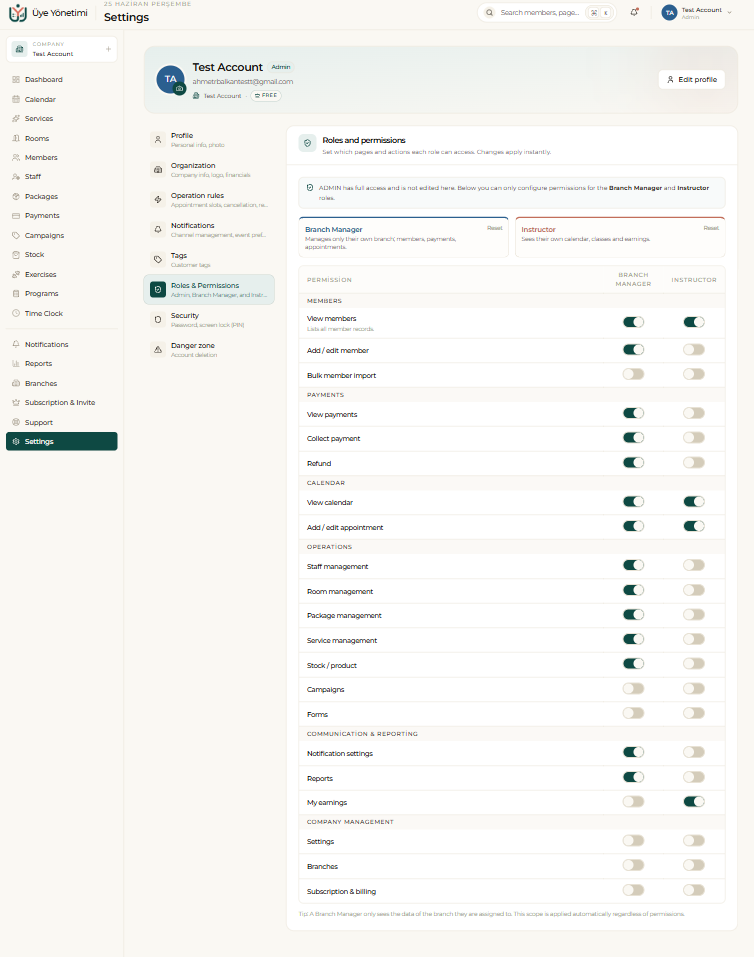
Roles and permissions
Security ensures that sensitive data is seen only by authorized people. You assign each staff member a role and specify in detail which screens and actions they can access. For example, an instructor sees their own calendar and members but cannot enter the financial reports or the cash-register screen.
The Admin has full access; for roles like Branch Manager and Instructor you toggle each permission (view members, collect payment, refund, manage staff, reports, settings, and so on) individually. Changes apply instantly.
PIN lock and audit logs
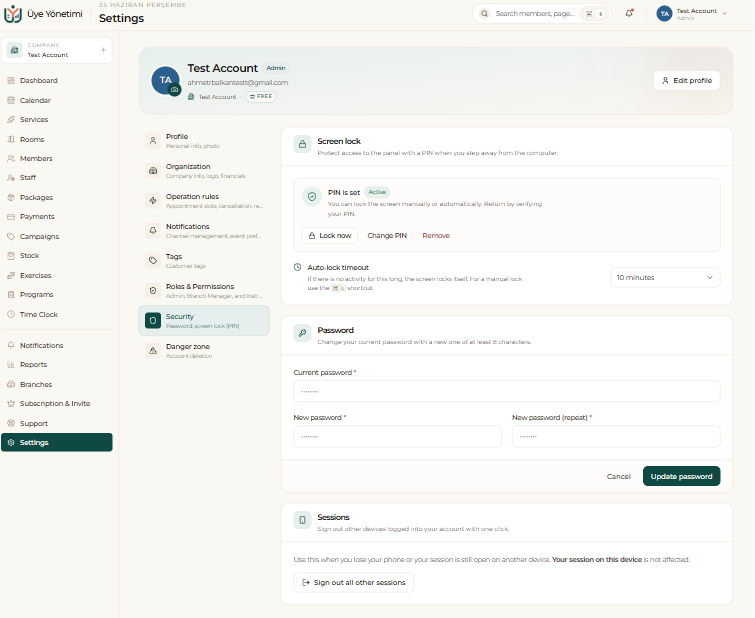
You can protect critical screens like the cash register, reports and settings with a PIN lock; on a shared device this prevents unauthorized access. You can also set an auto-lock timeout so the screen locks itself after a period of inactivity, and change your password or sign out of all other sessions from the same screen.
Every important action (collection, deletion, edit) is recorded with who did it and when. These audit logs let you review retrospectively and clarify responsibility when there is an inconsistency.
Step by step
- 1 Open the roles from the left menu via “Staff” (or “Settings › Roles & Permissions”).
- 2 For each role, specify in detail which screens and actions can be accessed.
- 3 Assign the appropriate role to each staff member (e.g. an instructor cannot see financial reports).
- 4 From “Settings › Security”, set a PIN lock for critical screens like the cash register, reports and settings.
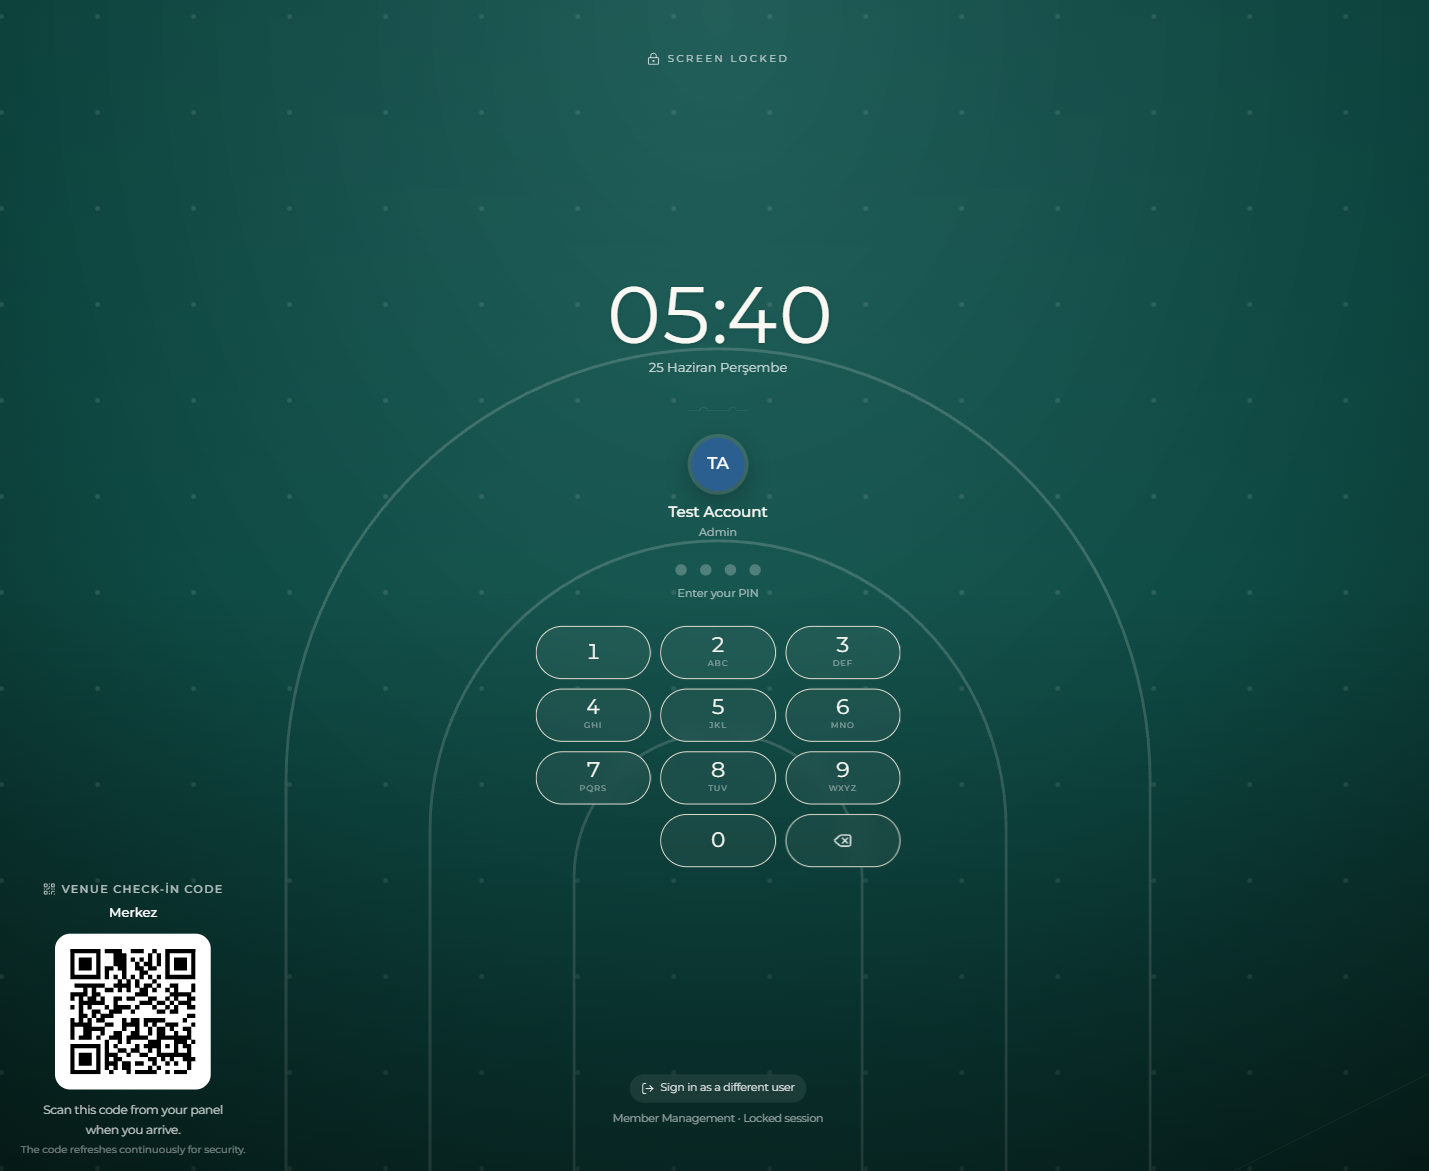
- 5 To lock the panel, choose “Lock” from the top-right menu (or let the auto-lock timeout pass); on the lock screen you return by entering your PIN, or switch to another account with “Different user”.
- 6 Audit collection, deletion and edit actions from the activity log, with the who/when information.